Windows is one of the most popular and widely used operating systems. Its capability to perform and manage core functions makes the system more valuable and helpful. It provides every computing need most easily to us.
At the same time, Windows systems are also problematic. Many users face several problems at different times. Similarly, Windows stuck is a major problem many users deal with and must fix.
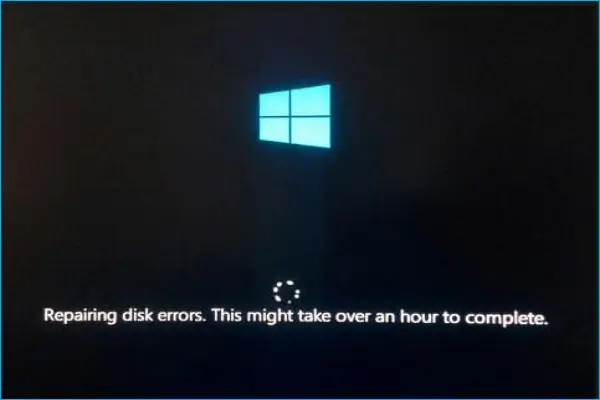
However, if you are stuck in this situation with the Windows system, here are some methods of how to fix Windows stuck on repairing disk errors this might take over an hour to complete .
Understanding Repairing Disk Errors
Disk repairing error is a common problem in the Windows system caused by a corrupt hard drive. And the system throws, “this might take an hour to complete on the boot screen.”
But in reality, it remained the same hour after hour to complete the process. And no doubt, it is really disturbing and frustrating. If we don’t tend to fix it, it might also bring other problems. We should look closely at some possible reasons why it keeps occurring before panicking over the situation.
Firstly, it appears because of HDD/ SSD failure or damage to any drive sector. Corrupted files could be a reason for facing such issues. Secondly, the system had a problem with the hardware.
How to Fix Windows Stuck On Repairing Disk Errors
Windows system is known for its frequent problems. On the other hand, it has enough smart capability to fix any issue, which is the biggest advantage of having a Windows system. However, without any further ado, let’s dive into the processes.
1. Give Enough Time to Finish the Repairing Process
If you get this disk repair process, allocating proper time is best. Patiently wait until the finish repair process is completed. It might take an hour and more, even if it can take a long period, don’t rush its process, let the system work on itself.
However, if you force-stop the process, chances are high that the drive can be damaged and technically, you will end up with data loss. So how much time does it take? Give it to the completion of the process.
2. Repair Disk Using Volumn Repair
This is one of the considerable methods when someone gets any disk-related issues. So, if your hard drive or external drives have some issues, you could use this method.
- Press Windows > search for PowerShell > click on Run as administrator .
- Now type this command for each disk by changing the drive letter. repair-volume drive-letter -scan repair-volume drive-letter -offlinescanandfix repair-volume drive-letter -spotfix
- It will repair common disk-related issues.
3. Repair Disk using System Restore
Repairing the disk using the system restore method. But it is only for those who have created any restore points before. Otherwise, you can skip this process.
- Press Windows > search for Control Panels > Open it.
- Next, click on Recovery . You can search for recovery on the control panel.
- Then, tap on Open system restore .
- System restore will open and then click on the Next button.
- Select the problematic drive, update, and app and click on the next button.
- In the final step, click on Finish . Your problematic drive, app, and update will be cleared out.
4. Disconnect All External Devices
Using a perfect external device and drive makes sense in different approaches. However, all the time, using other peripherals is not as good as getting such issues on the Windows system.
When you disconnect all external devices, it will help the system manage everything in a better way. Moreover, detaching devices allows for the diagnosis of the system efficiently.
5. Test Hard Drive Failure
Nothing will help you if your hard drive or SSD catches any issues. Because it is a physical component, and no one can guarantee you a lifetime. However, it is a different thing, but drives can fail.
When it fails or is damaged, the Windows system throws such issues on the screen in one way or another. Therefore, you have to check its conditions.
Third-party tools like HDD Scan , GSmartControl and Disk Check come to my mind right now. You can get help with any of them. HP and Dell have their own program to test drive and other components.
Hence, if you find any problem, follow their instructions. Other than that, take help from a technical person if you can’t handle the situation.
6. Perform CHKDSK in Safe Mode
Since it is a drive-related issue, performing the CHKDSK can fix it. However, if your drive is partially damaged, CHKDSK will help you save other parts from data loss and other related issues.
- Right-click on the Start menu , click on the Power Icon , then press & hold the Shift key and restart.
- A blue screen will appear with some options; click on Troubleshoot > Advanced Options > Startup Settings > Restart .
- Next, click Enable safe mode by choosing the appropriate number , and hit enter to restart the system in safe mode.
- Once your system is ready. Then press Windows > search for Command Prompt > click on Run as administrator. A dialogue box will open up. Click on Yes.
- In Command Prompt, you need to paste this command and hit enter . Chkdsk /f c:
- Again, press Y for Yes when you ask for “Would you like to schedule this volume to be checked the next time the system restarts? (Y/N). That’s it. You have successfully checked the driver.
7. Use Automatic Repair
When it comes to extra functionalities, the Windows system has more than enough. Automatic repair is a useful feature to fix any issues on the Windows system while booting. Here’s what you need to follow.
- Click on the Windows, then click on the Power icon , after that press and Shift key, and click on the restart .
- Just like before, follow this process: Troubleshoot > Advanced Options .
- Now click on the Startup repair ; it will fix any issues in booting the system. It can even help Windows stuck on repairing disk errors.
