Recently, many users have reported facing the error code 0xc00007b in Windows 11 whenever they try to open an application. The complete error message may read, ‘The application was unable to start correctly (0xc00007b). Click OK to close the application.’ The reason for this error message is still not sure, and you may encounter error code 0xc00007b in Windows 11 due to multiple reasons.
If you have made your way to this article looking for troubleshooting steps to fix error code 0xc00007b in Windows 11, then you are at the right place. In this article, we will be listing all the fixes to help you troubleshoot error code 0xc00007b in Windows 11.
Also Read- Fix Fingerprint Sensor Not Working in Windows 11
Best Ways to Fix Error Code 0xc00007b in Windows 11
1. Restart Your PC
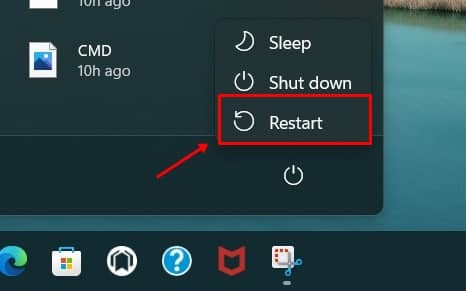
You are likely to encounter this error message due to temporary bugs in the software. Such issues can easily be resolved by restarting your PC. You should try restarting your PC and running the application again. If restarting your PC didn’t help you solve the issue, you can move to the next step in this article.
2. Update Your Windows
Outdated Windows or pending Windows updates may also be the underlying reason behind facing error code 0xc00007b in Windows 11. You should try updating your Windows and then check if you still encounter the issue or not. You can update your Windows by following the steps mentioned below-
- Open the Settings app on your PC by pressing the Windows + I key combo.
- Now, click on Windows Update on the left sidebar of the settings app . After that, on the right side, click on Check for updates.
- Download and install all the updates your PC finds and then restart your PC.
- After you have successfully restarted your PC, relaunch the application you were facing a problem with.
This should most probably fix the issue, and you should now no longer face the error code 0xc00007b in Windows 11.
3. Run Application As Administrator
Another thing that you can try doing is running the application with which you are facing problems as an administrator. To do so, follow the steps given below-
- Head to the installation folder of the application you are facing an issue with.
- Here, right-click on the executable file (.EXE) file, and then from the context menu that opens up, select Properties.
- Head to the Compatibility tab in the properties window.
- Now, check the checkbox saying Run this program as an administrator and click on Apply and OK.
4. Reinstall Microsoft C++ Redistributable
If you still encounter the error code 0xc00007b in Windows 11, you should try reinstalling the Microsoft C++ Redistributable. To do so, follow the steps given below-
- Press the Windows + R key combo to open the Run Dialog Box. In the run dialog box, type appwiz.cpl and hit Enter. This will take you to the Programs and Features section of the Control Panel.
- Here, search for Microsoft C++ Redistributable . Select it, and then click on Uninstall. When asked to confirm Microsoft C++ Redistributable, confirm it.
- After uninstalling it, click on this link to head to the Microsoft Visual C++ Redistributable download page.
- Now, download and install the Microsoft C++ Redistributable and install it on your PC.
5. Install .Net Framework
If the .Net framework is not installed on your PC, you will likely face the issue. You should try installing .Net Framework and then see if you face the problem or not. Given below are the steps to install the .Net framework-
- Open the Run Dialog box by pressing the Windows + R key combo.
- In the Run Dialog box, type optionalfeatures and then hit Enter.
- In the Windows Features window, check the checkbox for .Net Framework 3.5 and then click on OK.
- This will install the .Net framework on your PC, and you should no longer face the issue you were facing.
6. Reinstall App
If you face this error with a particular app, you should reinstall that app. You can follow the steps given below to reinstall the app-
- Press the Windows + I key combo to open the Settings app on your PC.
- Click on the Apps section on the left sidebar of the Settings app, and then click on Apps & Features on the right side.
- From the list of apps, search for the apps you want to reinstall. Click on the three ellipses next to the app, and click on Uninstall . Confirm uninstalling the app.
- After uninstalling the app, download and install it from the official site or Microsoft Store.
Bottom Line
Error code 0xc00007b in Windows 11 is an application error that may prevent you from accessing specific apps. If you face this issue, you can follow the troubleshooting steps in this article.
Windows 10 introduced the fingerprint sensor in 2015. Many users reported that their fingerprint not working after the Windows 11 update. Although you can reboot your computer using the “Restore from a previous time” option, it may not always work. Rarely, other programs like antivirus programs can also cause the problem.
The worst thing about Windows 11 is its sensitivity to touch. The program will not start if there is even a little dust on the sensor. The problem is that the sensor isn’t actually sensing your touch but is also sensing repeated touch patterns.
Also Read- Disable Driver Signature Enforcement in Windows 11
Best Ways to Fix Fingerprint Sensor Not Working in Windows 11
We compile the best methods to fix Fingerprint Sensor Not Working issue in windows. You can try each way one by one. We include images with each step to make it easy to follow up on the steps.
1. Add New Fingerprint
- Firstly go to the Start menu of Windows 11 and click on Settings . Alternatively, you can press the Windows + I button.
- Now on the left many select Accounts .
- Click the Sign-in options on the right pane of the Accounts menu.
- After that expand the Fingerprint recognition options where you have the option to remove or add new fingerprints. Click on the Add a finger button.
- Follow the instruction from your screen and try to log in with newly added fingerprints.
Related- Remove Fingerprint Recognition Sign-in with Windows 11
2. Uninstall and Reinstall Drivers
- Press Windows + R button to open a Run dialog box and type devmgmt.msc and hit enter.
- Now you can see your device manager is opened. Locate Biometric devices and expand that option.
- Now from the below list of Biometric devices, you need to right-click on that specific device and click on Uninstall device .
- Click on Uninstall button on the confirmation window and restart your computer.
- On the restart, windows will automatically detect and install fresh drivers on your Windows 11.
NOTE- If your windows do not automatically install drivers we recommend you to use driver updater tools that can detect your hardware and install suitable drivers for your computer.
3. Update Biometric Drivers
- Press Windows + X key to open the start menu options and select Device Manager .
- Locate Biometric devices and expand that option and right-click on the device and click on Update driver .
- On the next screen, you need to select Search automatically for drivers option.
- After that follow the on-screen instruction to update your Biometric Drivers.
4. Check for Windows Updates
- Click on the start menu and select settings .
- On the left menu click on Windows Update in the last option.
- Now you can see the windows updates available for your PC. You can also click on Check for updates .
- If there is any latest update available for your windows 11 pc they can fetch and show in this option.
Conclusion
Above are the most common and technical ways to fix Fingerprint Sensor Not Working in Windows 11. You can start fixing fingerprint problems from the basic method. If that can solve your problem, it’s awesome; otherwise, you can go for advanced fixes. If you have more fixes to solve this issue or have any doubt about this article, let me know in the comment section.
