Editing your host’s file allows you to override the Domain Name System (DNS) for any particular domain on a specific machine. DNS management is very handy when you wish to test your site without making the test link live with SSL.
Verify that an alias site works perfectly with DNS changes. Editing your host’s file causes your local machine to look directly at the Internet Protocol (IP) address that you specify.
Users might get confused while editing the host file because it varies from device to device. However, this is the main reason why we are here today. In this guide, I will show you the simple steps that you need to follow while editing your host file on Windows, Mac, or Linux. So, let’s start with it.
Also Read- Best Lightweight Antivirus For Windows 10/11
How Do I Edit My Hosts File on Windows, Mac and Linux?
If you want to update or edit your host file on your PC, then simply follow the steps mentioned below:
1. How to Edit Hosts File in Windows 10, 11, 8.1 & 7
It is a bit complicated to edit the Windows hosts file, but not impossible. So, you can easily do it with our simple guide. You can see the steps visually to understand better.
- Firstly, go to the S tart Menu and search for Notepad and Run it as an A dministrator .
- After that, click on the File tab . Then, hit the Open button.
- Once done, open the following path: c:\windows\system32\drivers\etc\hosts.
- Now select All Files in right below corner. That’s it. Now, edit your Hosts file as you want.
2. How to Edit Hosts File in Linux
This method is for people who use Ubuntu or Linux as their daily driver OS. Well, it’s free and open-source. Also, using this, you can edit the Linux hosts file directly in the Terminal. So, here are the steps that you can follow:
- First of all, open the Terminal Window command line by following the path: A pplications > Utilities > Terminal.
- Now, open the Linux host file by using the Command:
sudo vim /etc/hosts
- After that, modify the file, use the following command, and also don’t forget to save your file in VIM format before closing the window:
0.0.0.0 server.domain.com
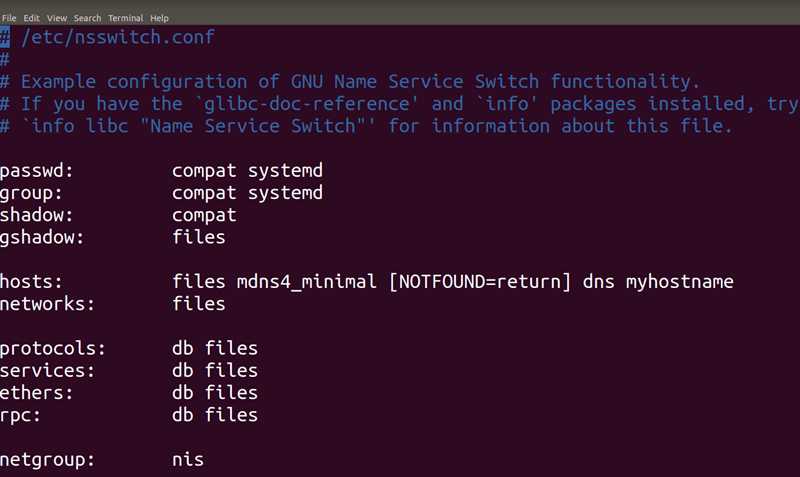
That’s it. Now, if you want, you can switch your name server. By default, the host file bypasses the standard domain name server lookup. But another file in Linux notifies the OS about the IP address translations, and that file is nsswitch.conf .
However, if it is set to first lookup the DNS, it’ll automatically skip your host file and navigate straight to DNS lookup. Well, to check the configuration, use the command in your Terminal:
cat /etc/nsswitch.conf
Now, a list of information will be listed. So, ensure that the files list appears first under the Hosts . If not, then use the Command:
sudo vim /etc/nsswitch.conf
This will open the nsswitch.conf file. So, now you can simply change the Hosts settings to Files appears first and DNS at the end.
3. How to Edit Hosts File in macOS
This is a process similar to the one you can follow in Ubuntu. Open your favorite GUI text editor, and it is easier to do so from the Terminal. So, here are the steps that you need to follow:
- First of all, open the Mac Terminal. To do so, follow the path: Finder> Applications > Utilities > Terminal .
- Then, use the following command in your Terminal:
sudo nano /private/etc/hosts
- Your system will prompt a screen asking you to enter a password. Use the same password you used to log in.
- After that, you need to edit your Mac Hosts files. So, ensure that the IP address comes first before the domain address. However, if you make any mistake while editing it, you can use # to tell Mac OS to ignore that Command.
0.0.0.0 server.domain.com
- Now, simply save the changes you have made by pressing the Command + O and exit from the window by pressing the Command + X .
